Another one (of several things) that annoyed me was the headlight frames. They were yellowed, faded, and the passenger side was actually cracked and held together with some silicone. So I came across some new ones from rockauto.com (MUCH better pricing than ebay or any of the other parts sources).
I also decided to remove the antequated headlight wiper system, as I'm never planning to drive this car in foul weather, and in my opinion it detracts from the overall appearance of the car.
Here's a couple pics of what the original headlight "doors" looked like.

You can see the faded plastic and the crack in the passenger's side frame.

So the first thing to do is to remove the actual wiper arm. First pull it out towards you.

You will see a nut behind it, loosen the nut, and the arm will come free - now there is also a section of hose for the washer system (Yes MB thought it was a good idea to spray washer fluid over the front of the car to "wash" the headlight lenses). The hose simply slides off the nipple that is next to the motor shaft.
Once it is off this is what you will see.

Now it's time to get into removing the headlight housing, and the wiper motor shaft and washer nipple.
First open the hood, then pop out the corner parking light. The corner light is held in from behind with a clip you need to squeeze and then slide the light forward.
Then you need to remove the plastic covers directly next to the headlight, about 2" wide, they are held in with a phillps head screw at the top that goes into a plastic insert. Pull the screw and use a panel removal tool to get the insert out. Then you need to remove the metal strip underneath the headlight. There are two phillps screws attaching this, one at the bottom of the fender directly behind where the fender is, the other underneath that plastic trim you just removed. It's pretty self explanatory.
Now the trim will come loose from the body, but the rubber seal is attached underneath it. It has little pegs that go into the metal trim, but the rubber seal continues all the way to the edge of the bumper and goes between the bumper and the fender, you have two choices here, you either need to lower / detach the front bumper, or you can let the trim dangle. I let the trim dangle.
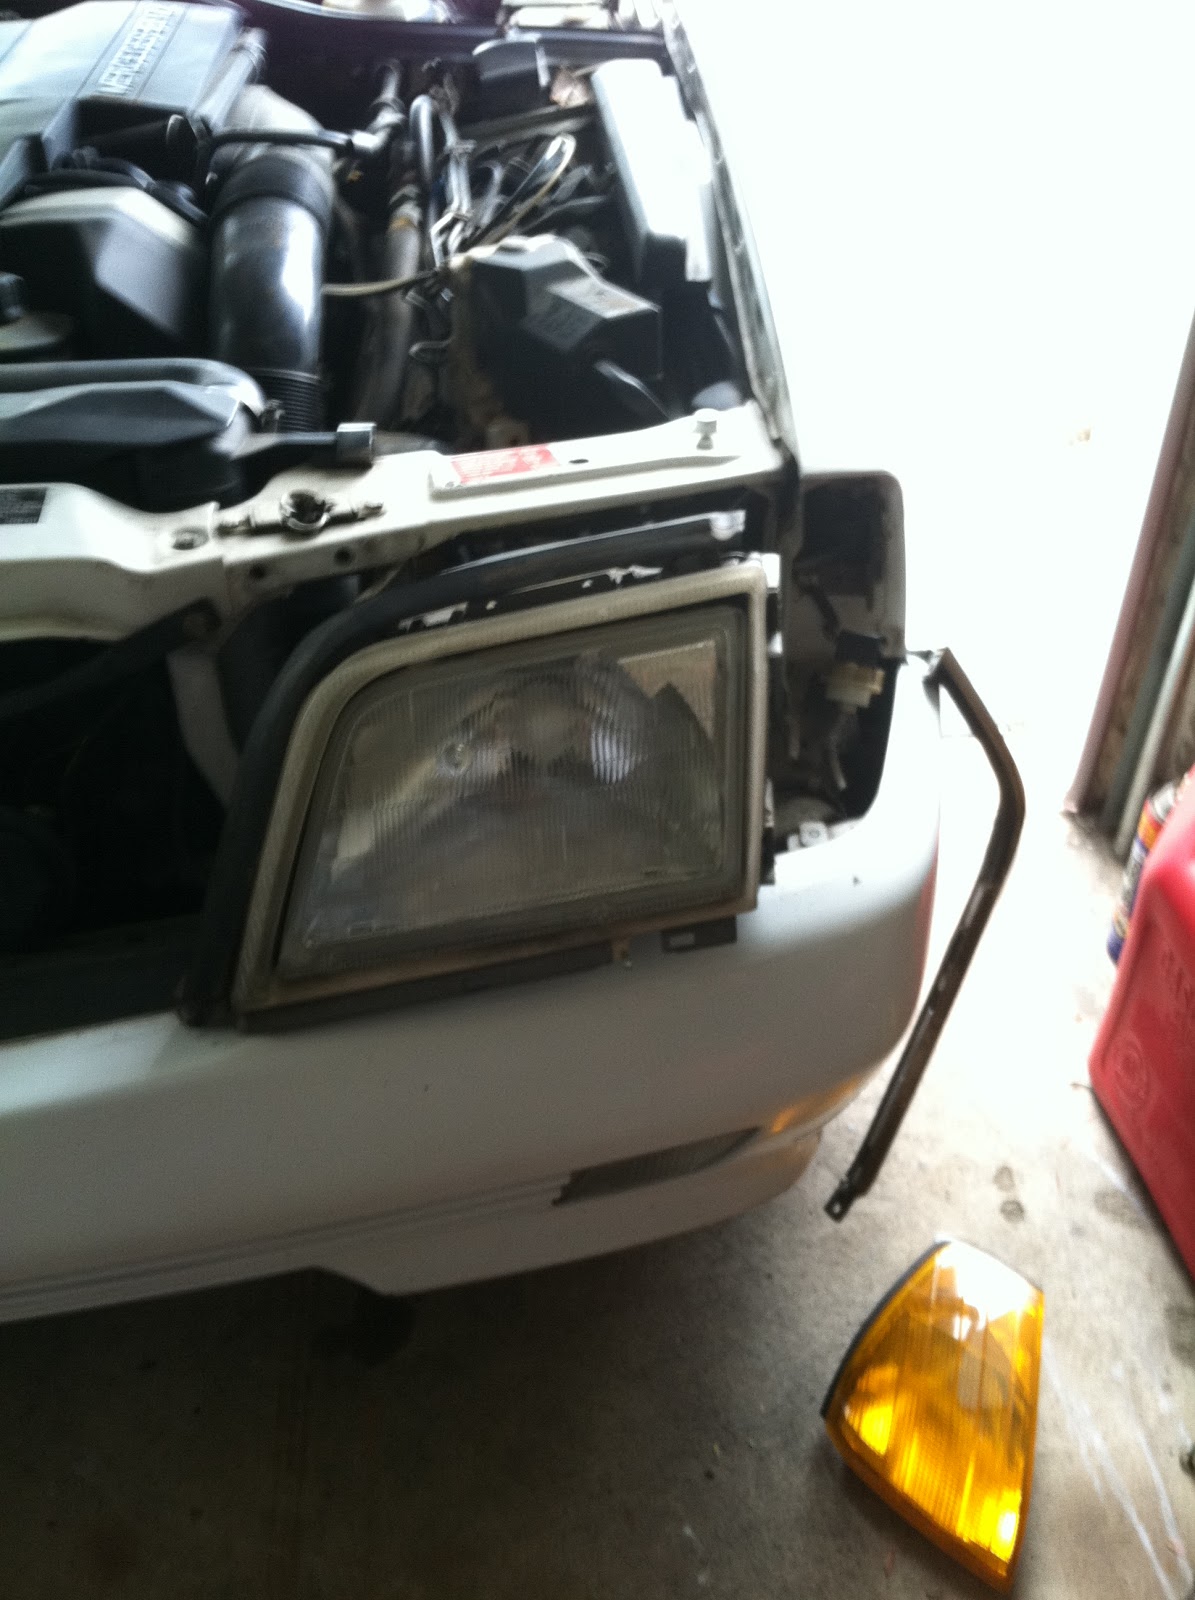
Now we need to detach the headlight housing from the body. 2 8mm bolts on the side of the of the corner lamp, and one 8mm bolt on the other side, that goes into a little plastic insert.
Pull those 3 bolts off, and the headlight is free from the body. You can lift the headlight out. First thing to do, you will see the wiper motor shaft, and the nipple for the washer are on a plastic bracket held in by 2 smaller 8mm bolts, remove those two bolts, and you can slide out the bracket. The wiper shaft is held onto the motor via an 8mm nut, remove that and set the bracket, the shaft and the nipple off to the side.
Now you have to carefully remove the rubber gasket from the old headlight door. It's held in with little small plastic push pin clips. Small screwdriver, some patience and a panel / clip tool and they are out here.
The headlight housing will now look like this:

Now get out your new headlight doors, these are the ones I used, part number is on the boxes for reference:

Here's a side by side of old door v/s new.

Once it's on, reattach the rubber gasket, and put the headlight back into the body. Hint, start all 3 bolts before you tighten any of them down. AS most insturctions say, assembly is the reverse of removal :)
And this is what you end up with:

One more thing that unfortuantely I didn't photograph but is pretty self explanatory. Once you have the passenger side headlight out, you need to disconnect the electrical connector from the pump that feeds the headlight washers at the bottom of the windshield washer reservoir. The reservoir is held into the car by 1 8mm bolt at the top, then it slides up (there is a metal body bracket it slides onto). Simply following the washer fluid lines will make it clear which one is for the headlights. You can also disconnect the electrical connectors and or completely pull out the headlight wiper motors. I just disconnected the harnesses but left the motors in the car.
And here's an "after" pic. It really makes the car look newer / cleaner.

No comments:
Post a Comment