Sunday, October 10, 2010

Cheap, Functional, and reversible visor door repair...

Ok, another one of the things that really annoyed me about my car was that the "doors" or folding covers for my sunvisors were missing. Inevitably these all break, especially in r129s that sit in the sun with the top off. The plastic is brittle, and little pieces crack off.

You can see the exposed mirrors / lights in this pic above.

Now, finding R129 sun visors in good condition is a task in itself, especially considering my interior color. They are also VERY expensive, because of their rarity (over $150 per side). So I decided to think outside the box on these, and while searching ebay, found a set of w126 visors, in the right interior color. I ended up winning them for $12.50 + postage.

Initially I was ambitious enough to think that I could just transplant the inserts, and that all would be well. Well I came to realize that although close, the inserts are slightly larger than those used on the r129, and that they would not work. Initially I was going to call it a loss and put the w126 visors on the forums to try to recoup my expenditure. Then I started thinking about it, and decided that I really didn't need the $12.50 that badly and I was willing to experiment. Note: w124's, w201's and w126's use the same visor insert so those visors are plentiful and cheap.

My criteria for this procedure was as follows.

- Nothing irreversible could be done to the r129 visors, because of the off chance that one day I find the right inserts for the right price.
- The finished product had to be cosmetically acceptable, and look like something factory
- I didn't care if the lighted mirrors worked or not, since they didn't work now, and I personally don't see much of a need for them. (Women please don't shoot me).

So I set off trying to see what could be done. First I removed the visors from my car. Here is a picture of the visor removed.

As you can see the visor door had broken off. First step, pry the mirror and light cover off - it's just a press fit. Then you will see this:
Note: In this picture the 6 #1 phillps head screws attaching this internal assembly to the actual visor have already been removed. You will also probably find bits of broken plastic that were the remnants of why your original doors broke off. 
Once you remove those screws pull this assembly off and you will see the base of the r129 visor. 
You can see the 6 screw holes in this visor. I then proceeded to remove just the door off of one of the w126 visors - note: you have to remove the mirror / light cover piece from the w126 visor
Here is a pic of the door removed.

Now the first thing I did was lay the door over the r129 visor to see if this was even a viable possibility. 

As you can see, with the innards removed, the door is almost a perfect fit. Now the key to this is those two little pegs the w126 visor uses to hinge with. They are visible in the above pic. What you need to do is CAREFULLY drill two holes in the sides of the r129 visor for those pegs to fit into. that way the w126 door will now be hinged on the r129 visor. The other thing you need to do is trim the inside plastic of the w126 door, so that it will allow it to fully fold and close. This will make sense when you do this. So what I did, is mark the locations of the pegs with a pencil, and carefully drilled two holes with a 7/64" drill bit. Then, and this is the scary part, you have to get the pegs into your newly created holes. The visor door is hard plastic, but it WILL flex, you won't break it. Once you do that, close the w126 door, trimming the inside plastic as necessary to get it to sit flush.

 Here is a picture of the finished product:

The visor door actually does hinge up and down, although it a bit tight of a press fit when closed, however there are no internals, if one were to hinge the visor door upwards all you would see is the foam inserts. However if you were to remove this visor door, you could reinsert the r129 pieces, and have no visible traces of these doors being on there. Sure I lost the mirrors, but for $12.50, this makes the car look much more presentable than exposed mirrors. 

Here is a pic of both the visors done and ready to be reinstalled in the car.

"///AMG" Pedal Set

So I scored this "///AMG" branded stainless steel pedal set on ebay for $26.50 shipped. It's not needed or anything, but I figured it would at least dress up the car a bit.


Initially it seemed as if it were not going to fit. So I contemplated selling it. After there was a ton of interest expressed about it, I decided to take another look, and realized that the only thing that would not fit would be the dead pedal, as the piece is flat, and the floor in that area is not. R129's don't have a really clearly defined dead pedal area in the floor, and this piece is flat, the floor is not.

So I decided to go ahead and install the 3 pieces that would fit in the car.
First I put the emergency brake release pedal on. The only thing that it needed was to pop off the original rubber one, and instead insert the new steel one, the rubber backing was the same.
Now the Accelerator and Brake pedals require a bit more work. The aftermarket pedals are held on with allen head bolts. First thing to do is remove the rubber brake pedal cover from the pedal. What I did next was to use a simple spring clamp to hold the pedal in place while I drilled the 4 holes for the bolts. 
The pedal material isn't that hard, and a 12v drill with a carbide 1/8" drill bit went through fine. Once I drilled all 4 holes I inserted the bolts in and tightened them up with the allen key. 
As you can see in the picture above, the next thing is to remove the factory rubber pedal covering the accelerator pedal. There is a rubber loop across the bottom of the pedal cover where it attaches to the base of the actual pedal. you can either unscrew the pedal from the floor and slip it off, or you can just cut it off (I chose the easy way out) 
Once you have the pedal off, clamp the accelerator pedal into place. The factory accelerator pedal is plastic and drills very easily, this part takes 2 seconds. 
Then just attach and tighten the bolts for the accelerator pedal and you're all done. I think it really adds to the look of the car. And don't mind the cheap all weather mats, I'm looking for a set of r129 mats in the right color, Just didn't want to mess up the carpet in the meanwhile.
Here's a pic of it all done, from a bit further.


Peeling center caps no more...

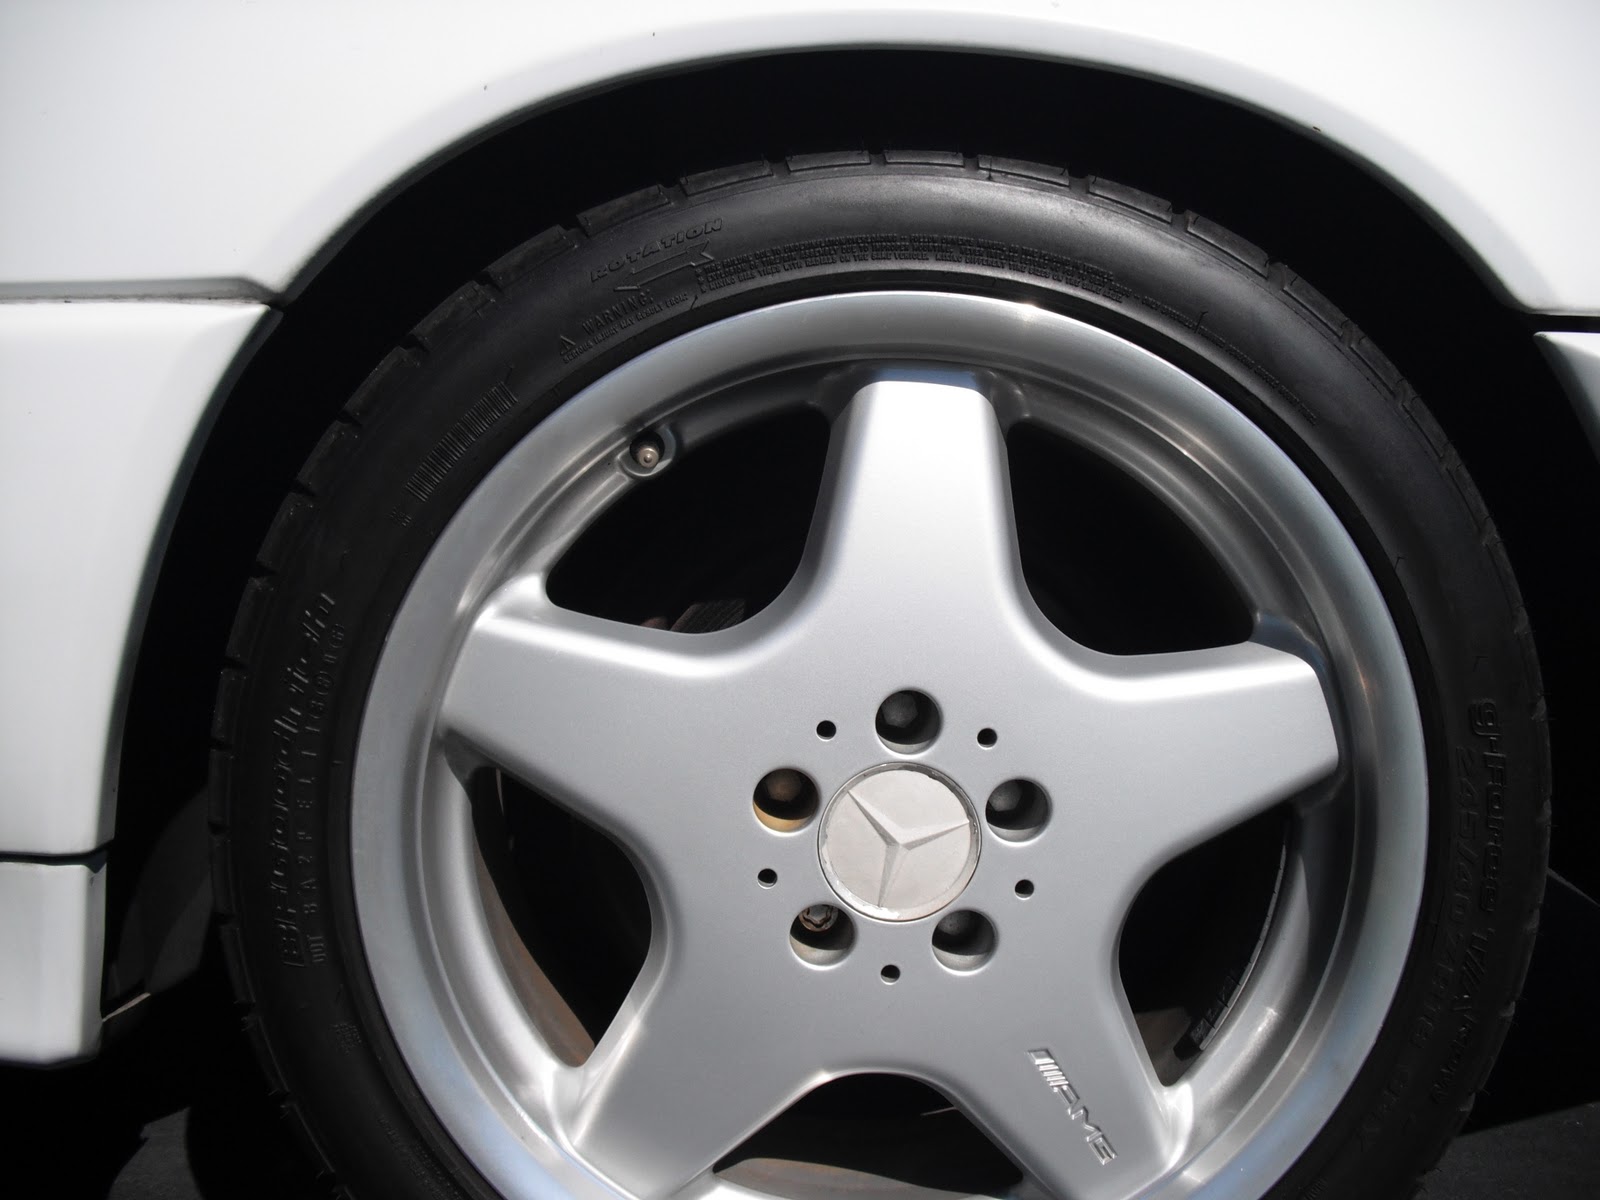
So another one of the cosmetic things that bothered me about my 500sl was the fact that despite having the very nice and correct ///AMG wheels (with proper 129 part numbers) the wheel center caps had seen better days. The paint was peeling in some way on basically all of them, although a couple had the paint completely peeled off.

This is what they looked like:

This was one of the better ones. The next one had the paint peeled completely off:
After some searching, and looking at the various sets of center caps available for Mercedes wheels - virtually any MB wheel post 1985 uses the same center caps btw, I decided to look for a set of these:
They are from the newer 2001+ cars, and the Mercedes star and outer ring are chrome while the center is the standard silver Mercedes wheel color. I thought they would make the wheels stand out a bit. I managed to find a set of used ones in perfect condition for $20 shipped on ebay. When I went to put them on I realized the car had a set of McGuard wheel lock bolts on it, after tearing through the car I realized that the key was there, however I have had nothing but bad luck with wheel locks and the keys, so I ordered 4 new wheel bolts, and removed the wheel locks while taking off the wheels to change the center caps. 

Here is the car with the new center caps on. 


Sometimes it's the small things... There are a lot of little detail items this car needs that still need to be addressed. Slowly I'll get through all of them.

Wednesday, October 6, 2010

Seeing Clearly

Well, after years of driving my Jaguars, which all feature HID lighting systems, I guess I've been spoiled.
I found the halogen headlights in the 500sl woefully inadequate. Now, I was faced with two options as far as updating the lighting. First, replace the stock halogen headlights with factory HID headlights, which would cost approx $600 - $700  used depending on the source, or do an aftermarket HID conversion kit.

I started searching and went to a website run by Jim Powell (who I know from the bmw forums), called DDMTuning.com. HID conversion kits are $25 + shipping there at the moment. I decided I would give it a try as I really had nothing to lose if I didn't like them. They are plug and play, no cutting of factory wires required, therefore if I was unsatisfied with the results, I could always remove them and stick the halogen bulbs back in. So I ordered a 9006 kit, in 4300k - the brightest HID color, and the one used by all the OEM car companies. I know this isn't the best way to approach this, and that a factory HID conversion would be a better choice, but at the moment, there are other priorities I have with the car and I didn't want to invest that much into the lighting upgrades. All in all this entire lighting upgrade including HID headlights, and replacement fog light bulbs came in at around $50.

This is a picture of what the kit looks like from their website.
The kit comes with two ballasts, and two bulbs, as well as the plug and play wiring.

It took me about 35 mins to install - 10 of which were spent fighting with the stupid bulb retaining clips.
I had to move the washer tank on the passenger side to get better access to the headlight, but other than that it was perfectly straightforward.

Now, for the fog lights, I was suprised to see that Mercedes had chosen regular H1 halogen fog light bulbs for this car, and not the yellow fog lights that were common on european cars of this era. My 1990 190e 2.6 I had 10 years ago actually had a yellow glass lens over the bulb socket to achieve the yellow fog light look. I briefly considered converting the fog lamps to HID on this car (I've done it in my Jaguars), but after looking at the housing and the bulb clip, I decided against it. Instead I decided to replicate the yellow fog light look of the era, and went with a set of Nokya H1 2500k yellow bulbs. They fit the bill perfectly, and give a good contrast to the HID lighting.

After installing all the lighting, and taking the car for the first drive, the difference is night and day. I feel like the halogens were like having the parking lights on relative to the lighting these put out. I have driven the car for a little while now, and since my headlights are properly aimed, I have not had anyone high beam me or otherwise protest to the the lights on the car.

Here are some pics of the car in the driveway with the lights on.

The yellow of the fog light bulbs doesn't show up that well until it's completely dark out, but the light they put on the road makes it clear that they are yellow.

Tuesday, September 28, 2010

Making Blue Interior parts

So my 500SL came with a rare dark blue interior color (color code 132), love it or hate it it's certainly unique. It was only used in the r129 chassis from 1990-1993, and was then discontinued. Since it wasn't that popular an interior color choice to begin with, and original Blue parts are at best 17 years old, finding replacement interior pieces in the correct color is a daunting task to say the least.

One of the little things wrong with the interior of my car was the little pieces that are at the top of the door panel, behind the mirror were falling apart. The original vinyl had delaminated from the backer, due to heat exposure and shrinkage. The driver's side had also had all the clips broken (Some mechanic had done quite a number on the driver's door in general, performing a shoddy power window regulator replacement). That piece would end up in your lap if you shut the door too hard.

Mercedes made the same body style r129 SL up to the 2001 model year, so there are plenty of good, used serviceable parts out there, however very few in the proper color, so after trying aimlessly to find these parts in blue, I opted for the closest match possible, black, figuring it would stand out the least.
In all reality the black pieces didn't look THAT bad and were ok in the interior, but the perfectionist in me was constantly annoyed by them, so I decided that I would seek out a solution, and decided to use a color vinyl dye to try to match the pieces.

After searching around local parts warehouses, I was able to locate VHT Dark Blue satin color dye. The color was close at least according to what the cap looked like, so I figured why not give it a try.

Here are the black pieces before spraying began. I cleaned them by wiping them down with some 70% isopropyl alcohol and allowing them to dry thoroughly.

This is the VHT Vinyl color dye I used
After shaking the can well for a couple minutes I sprayed on the first coat. I immediately realized that this stuff is much thicker and had a much denser pigment than conventional spray paint. Here are the pieces after the first coat was sprayed. 
You can see by the overspray how dense this stuff is. I sprayed a second coat just to ensure complete and even coverage, although the first coat pretty much did the trick. Here they are after the second coat:
The glossyness dissapears as they dry. This stuff has a pretty strong odor, but works really well. I recommend if you do use it, you use it in a well ventilated area. I did this inside my garage with both bay doors open, and you could still smell it several hours later. I allowed the parts to dry for 24 hours, then I installed them back in the car. Here is a picture of the passenger door panel with the piece back in place.
The color match is 90% perfect, only up close can you really see any sort of distinction, but having a seam there, it blends into the interior very well, and especially with the door closed, I don't think many people would realize that this part came from the factory in a different color originally. I'm satisfied. 


Sunday, September 26, 2010

Reupholstering the 500SL

Okay, so one of the main detriments of this car was that the leather seat upholstery was all but destroyed. The drivers side was much worse than the passenger side, and I actually ended up putting gorilla tape on the seat, just to keep it together.

So I knew that I had to get the seats reupholstered. Everyone advised against doing it myself, saying that it was next to impossible and that I would never get it to work. Well, I love doing things myself and I'm kind of stubborn so I decided to do it myself anyway. I found a seller on ebay named diamondmall, who sells pre sewn replacement seat covers for the Mercedes R129, as well as several other cars. So I decided to give it a shot... after all how hard could be??

Here a a couple Before Pics:


Things you need to know:

First we need to remove the seat cushions from the car. The lower seat cushions attach to the seat frame with 2 large phillps head screws on the bottom - remove them and then pop up the seat bottom, and pull it out of the car. Then move the seat forward, and tilt the back forward. You will see 2 T20 Torx screws at the bottom of the seat back. - Remove them - Mine were TIGHT, I had to use a channel lock plier on my t20 screwdriver. Then slide the seat back down and toward you and it will release from the seat frame. Heres what the seat frame looks like without the seat cushions in it - now is a good time to vacuum up 20 years worth of crap that has accumulated under there:

The plastic clips holding the seat back to the metal frame are easy. Just pry them off with a small screwdriver.

What's a huge pain are the 3 metal rods - which provide the pleats in the seats. They are in a cloth channel sewn into the bottom of the cover, and clip to another rod on the seat frame. Along the bottom there is a fiber channel that fits into grooves - use a pick or screwdriver to pry it out. This is how the entire bottom of the seat is held on along the edges as well. Getting them off is ridiculous, and you have to remove the horsehair / foam pad from the metal frame - it's just a friction fit there. Mine were completely rusted and two of them were in fact broken. I had to improvise at this point and cut up good old metal coat hangers, and used them as my new rods. This worked fine.

Then you have to feed the rods into the new seat skin, cut notches in the appropriate places, - hint - feed zip ties up the holes so you can mark the cover, then replace the white plastic clips and clip the rods down to the pad. Start in the middle, then do the two sides, then stretch the leather over the bolsters. On my car I had to add a bit of foam on the bolsters because 20 years of wear had kind of compacted it. It took me 8 hours or so to do the 4 seat cushions over two nights. The bottoms seem easier than the backs, but in reality they aren't - getting those fiber channels in there is a pain - Hint - start with the front corners and work backwards on the bottoms, if your corners dont perfectly line up, you want it to be on the back of the seat where it's tucked under, not where it's visible in the front.

Here are some pics during the process:
New Presewn cover next to original 20 year old passenger seat cover.
My Fiber channel was all but falling apart... 
Another shot of removing the fiber channel
Pulling the old skin off the seat. You can see the rods, and the clips that hold the "pleats" into place. You can also see the rust. 
Once you have the old skin off the seat, pull the horsehair and foam pad off the metal seat frame. It's just a friction fit, no fasteners but its a bit tough to get off. Also either wear gloves, or BE CAREFUL, some of those under seat parts are very sharp, and mine were a bit rusty. I have the cuts to prove it!! You can see all of my seat springs are completely intact however. 
This is after the 3 rods have been installed and clipped down. You now see the pleats made by the rods. At this point the seat may show a few wrinkles. Don't worry about trying to get it perfect right now. Next step is attach the horsehair pad - with the new leather back to the metal frame.

Here's the finished product. Now I didn't take pics of the next step but here is what you have to do. Flip the seat over once you have reattached the horsehair pad. First thing I would do is flip the fiber channels over so they are in the the proper position to go back in the channel. This will all make sense if you have taken the original skin off. Slowly pull the leather to get it close. I would start with the front edge, it's the hardest by far to get in, but the rest kind of falls into place once you do that. then do the sides, and lastly do the rear, so that if one corner doesn't line up perfectly, it wont show when the seat is reassembled in the car.

The backs of the seats are similar, except for a few things. The sides and top of the seat are held onto the metal frames by large plastic pieces that clip onto it. - pry them off slowly with a screwdriver. Only across the bottom of the seat is the same fiber channel. The center rods creating the pleats are exactly the same, and the clips are the same. The corner on the side that is notched for the seatbelt / headrest mount has a few staples but they are clearly visible, use a small screwdriver and a needle nose plier to remove them. I used a standard 5/8" staple gun into the horsehair pad to hold that corner down.

Here's a pic of the skin removed from the back and of the one problem I ran into, and sort of solved.
As you can see, the bolsters have shown wear. You need to add foam to them - not as much as you think, or you will have a gap there where the piece is missing. I used foam from and old chairs seat cushion, and attached it down with gorilla tape, you may need to pull the side bolsters on and off a few times to get that part right. Here's a pic of my finished product. - The wrinkles in it will come out with steam and use.  Once they are mounted in the car, I used a home steamer to iron out the skin a bit. There are still a few wrinkles in it. But nothing that looks bad.
Now you have to repeat the process for the other side, and then reinstall them in the car. It's been raining for two days, so I haven't really managed to take good AFTER pics, but the car looks a million times better. I didn't do the headrests for now, I do have the covers but the original leather was fine, and is almost a 100% match, so i decided that I didn't want to get into all that and left them as they were. 
This is an an after picture, In my garage before bolting the seat down or steaming it. 
I hope this guide helps people, and that you realize it's not as hard as you thought. There are some tips and tricks, and although my install isn't 100% perfect,  its 95% and I'm extremely pleased with the results. Especially considering what I started with. I will get some good after pics once the weather clears up. 


Wednesday, September 1, 2010

Just a quick Update

Not much to report during the week. Been busy with work and repainting my house.
The car passed NJ state inspection with flying colors on Tuesday, so it's good till August 2012
I'm picking up an infinity basslink powered 10" sub off of craigslist for $40 this evening, and I think I'm going to work on the sound system this weekend.

More to come....